PS3 Media Server is an interesting alternative to VLC streaming, as it allows you better control over the media being played, it does allow you to choose what to play and even to navigate the stream, although it won’t allow you to navigate transcoded streams.
Again, this guide is meant to be more of a playground test showing how to get it working with XBMC, this must be the second time I tried it and I know it can be frustrating due to the number of options you need to change to make it work for XBMC for Xbox.
This is what I’ve used:
The software comes with a configuration file to support XBMC, in which I’ve changed a few settings to better suit XBMC for Xbox. Edit “%ProgramFiles%\PS3 Media Server\renderers\xbmc.conf” (or %ProgramFiles(x86)% if you have an x64 OS) and change the following options:
 720x576 is the usual PAL resolution, but that’s a 1.25 ratio. Anyways, I’m not going to redo all the screenshots and everything so I’ll leave that to you as homework.
Next I chose to always transcode the .mp4 extension by adding it to the TranscodeExtensions (that will make the video appear in the list on XBMC side ready to be played transcoded, rather than go into the #TRANSCODE# menu, thought I show case it in here). I’v also added the avi extensions to the StreamExtensions that way you can play it (and navigate the stream) from XBMC. As I mentioned earlier you cannot navigate an MEncoder transcoded stream (I believe PS3 Media Server has a note on that somewhere).
Now you can proceed at starting PS3 Media Server and start the configuration in the GUI interface. You can change a few more settings that I will mention, but I will keep it at minimum for brevity sake.
Add your media folders into the Navigation/Share Settings tab. If you don’t it will share all disks on your machine – I just added one folder for this test where I have the test video.

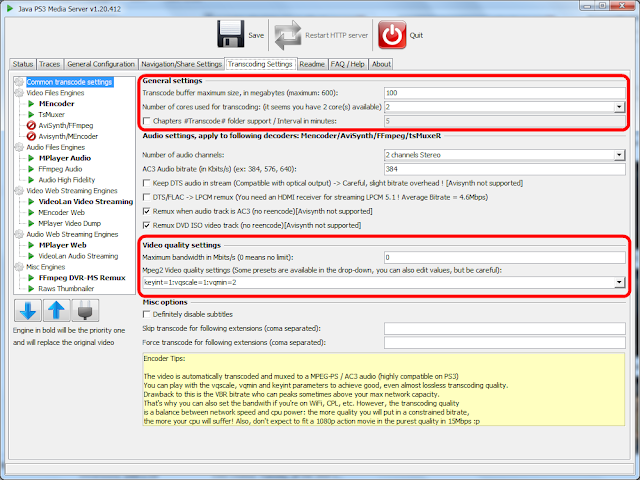
In Transcoding tab, I’ve changed a few things like the maximum buffer size (reduced it from 400 MB to 100 MB, might be a default of 10% percentage of the total memory), as I found when transcoding it will try to transcode as much as possible, you will notice the CPU usage of mencoder.exe while it fills the buffer at first and when the buffer starts to get empty – reducing the overall size allows to brake down the workload in smaller and regular chunks; it’s your choice really if you leave it with the default buffer.
The number of cores is defaulted in there, I didn’t change it (in my case two cores), you get to use both of them in the next screen.
Video quality section is a drop down and you get to choose the best setting for your system – obviously better quality comes with more processing power required and larger amounts of data to be transferred to the client, play with those to find your best settings.
Move to the next entry on the left, MEncoder and make some more configurations, mainly to uncheck the “Switch to txMuxer when H264 video is PS3 compatible” – since I’m streaming a H264 video this setting is appropriate for PS3 as it streams the video as it is obviously for better quality, but in our case here the video data / resolution is too much for Xbox so we’ll need to uncheck it.
I left the “Enhanced multicore support for H264 HD content…” unchecked although I do have two cores I noticed that one handles the transcoding just fine and didn’t want to overwork the laptop. Feel free to use if you want, seems to work just fine.
Now configuration completed you can restart PS3 Media Server (I’ve no idea whether pushing the Restart HTTP server button at the top is enough, personally I’ve restarted the software by closing it using the green play button in the icon tray area and restart it. I actually had to do that a few times and even logoff / restart XBMC4Xbox a few times to get the two seeing each other while making the configuration trial changes.
Use Process Explorer to look for the the java.exe process or kill it (make sure you check the startup directory so you don’t kill some other java apps you might have running on your PC), see screenshot below. Once cleared start PS3 Media Server again.

PS3 Media Server is a uPnP server so you will need to add a uPnP source. Go to Videos > Files and use the context menu to Add a source.


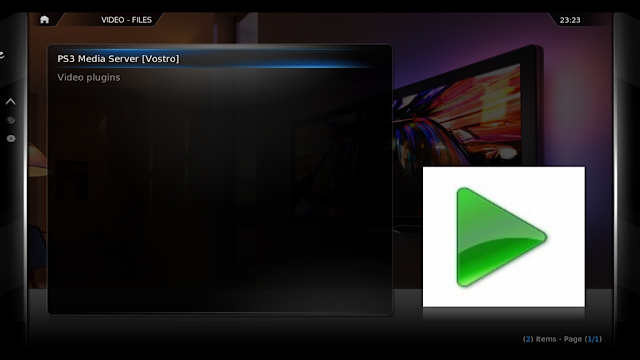
Now with the new source configured you can navigate it just like any other local or SMB source. You will notice though that besides the video files you will have additional folder entries where you can change settings on the server side (didn’t do much of those) or choose to play the original video or the transcoded version.


Notice that since I’ve added the MP4 extension to the TranscodedExtensions list in XBMC.conf it won’t display the original MP4 video (which although would play on XBMC will play very slowly), but the transcoded version of it. Otherwise you would have to enter the #—TRANSCODE--# folder and play from there.
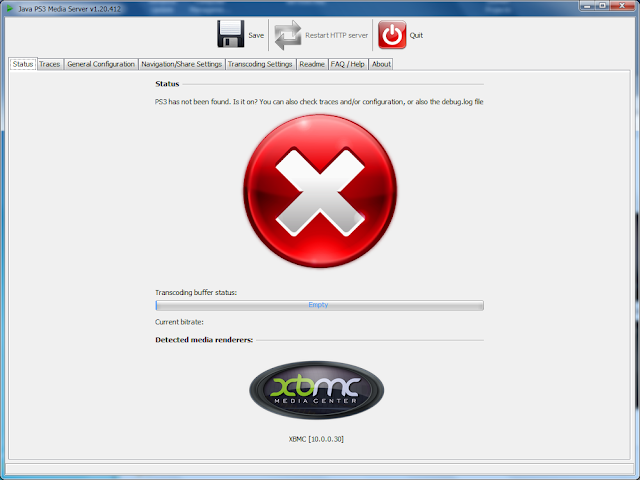
Before moving to the play screenshots I will mention that when you start navigating the PS3 Media Server contents it will show the XBMC client is connected:
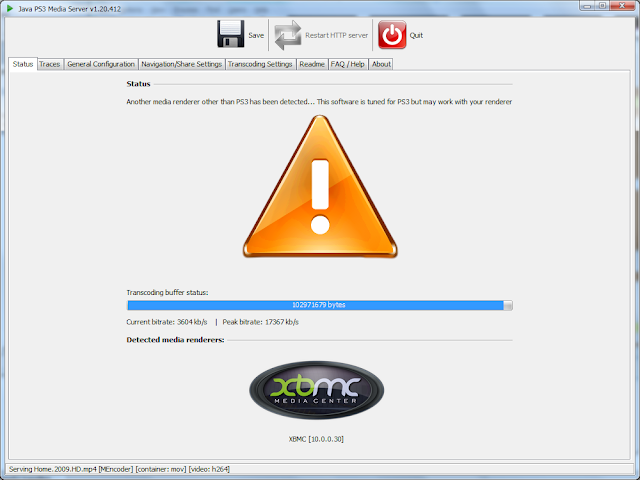
and when playing the transcoded contents the buffer starts to fill and the CPU usage will go up when mencoder.exe starts doing the business. As I mentioned earlier the CPU usage will go down when the buffer gets filled and then it will go up again at times to keep the buffer full.
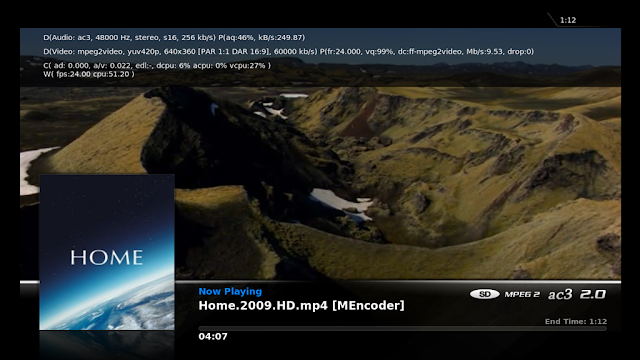
Here are some XBMC screenshots while playing the transcoded stream – some shots are in 640x360 and some in 720x576 as I was playing with things, notice the video info in the top area as well as the CPU and memory usage (debug mode).


Again, this guide is meant to be more of a playground test showing how to get it working with XBMC, this must be the second time I tried it and I know it can be frustrating due to the number of options you need to change to make it work for XBMC for Xbox.
This is what I’ve used:
- XBMC4Xbox 3.0 beta2 r30758 running in 720p;
- PS3 Media Server for Windows v1.20.412 BETA (download from Google Code repository);
- Home (2009) documentary – video H264 MPEG4-AVC, 1280x720, 24fps (avc1); audio MPEG AAC (mp4a), stereo, 44.1 KHz (as reported by VLC);
- Dell Vostro 1520 running Windows 7 Professional x64.
PS3 Media Server
The software comes with a configuration file to support XBMC, in which I’ve changed a few settings to better suit XBMC for Xbox. Edit “%ProgramFiles%\PS3 Media Server\renderers\xbmc.conf” (or %ProgramFiles(x86)% if you have an x64 OS) and change the following options:
- MaxVideoWidth=720
- MaxVideoHeight=576
- TranscodeExtensions=mp4
- StreamExtensions=mkv,hdmov,hdm,flac,fla,dts,ogg,asf,asx,m2v,avi
Next I chose to always transcode the .mp4 extension by adding it to the TranscodeExtensions (that will make the video appear in the list on XBMC side ready to be played transcoded, rather than go into the #TRANSCODE# menu, thought I show case it in here). I’v also added the avi extensions to the StreamExtensions that way you can play it (and navigate the stream) from XBMC. As I mentioned earlier you cannot navigate an MEncoder transcoded stream (I believe PS3 Media Server has a note on that somewhere).
Now you can proceed at starting PS3 Media Server and start the configuration in the GUI interface. You can change a few more settings that I will mention, but I will keep it at minimum for brevity sake.
Add your media folders into the Navigation/Share Settings tab. If you don’t it will share all disks on your machine – I just added one folder for this test where I have the test video.
In Transcoding tab, I’ve changed a few things like the maximum buffer size (reduced it from 400 MB to 100 MB, might be a default of 10% percentage of the total memory), as I found when transcoding it will try to transcode as much as possible, you will notice the CPU usage of mencoder.exe while it fills the buffer at first and when the buffer starts to get empty – reducing the overall size allows to brake down the workload in smaller and regular chunks; it’s your choice really if you leave it with the default buffer.
The number of cores is defaulted in there, I didn’t change it (in my case two cores), you get to use both of them in the next screen.
Video quality section is a drop down and you get to choose the best setting for your system – obviously better quality comes with more processing power required and larger amounts of data to be transferred to the client, play with those to find your best settings.
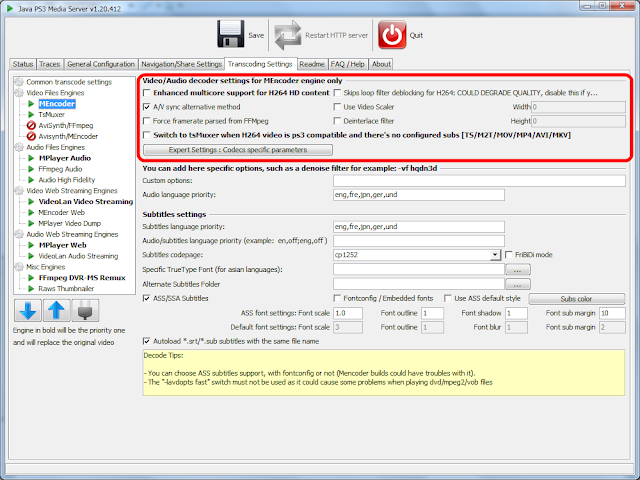
Move to the next entry on the left, MEncoder and make some more configurations, mainly to uncheck the “Switch to txMuxer when H264 video is PS3 compatible” – since I’m streaming a H264 video this setting is appropriate for PS3 as it streams the video as it is obviously for better quality, but in our case here the video data / resolution is too much for Xbox so we’ll need to uncheck it.
I left the “Enhanced multicore support for H264 HD content…” unchecked although I do have two cores I noticed that one handles the transcoding just fine and didn’t want to overwork the laptop. Feel free to use if you want, seems to work just fine.
Now configuration completed you can restart PS3 Media Server (I’ve no idea whether pushing the Restart HTTP server button at the top is enough, personally I’ve restarted the software by closing it using the green play button in the icon tray area and restart it. I actually had to do that a few times and even logoff / restart XBMC4Xbox a few times to get the two seeing each other while making the configuration trial changes.
Useful tips:
I will mention here a few things that might come in handy. If you find that MEncoder.exe will crash while transcoding the video, you might notice that you can still navigate the uPnP shares from XBMC as they might be cached, but you might need to restart PS3 Media Server to get it accessible again. Since it’s a java application I’ve noticed that sometimes when quitting the app it still leaves the java.exe (1 or even 2 at times) behind. You should either wait for those to clear or kill them before starting the application again. If you don’t do that you will not be able to see the PS3 Media Server in XBMC although from your point everything seem to be up and running.
Use Process Explorer to look for the the java.exe process or kill it (make sure you check the startup directory so you don’t kill some other java apps you might have running on your PC), see screenshot below. Once cleared start PS3 Media Server again.
XBMC configuration
PS3 Media Server is a uPnP server so you will need to add a uPnP source. Go to Videos > Files and use the context menu to Add a source.
Now with the new source configured you can navigate it just like any other local or SMB source. You will notice though that besides the video files you will have additional folder entries where you can change settings on the server side (didn’t do much of those) or choose to play the original video or the transcoded version.
Notice that since I’ve added the MP4 extension to the TranscodedExtensions list in XBMC.conf it won’t display the original MP4 video (which although would play on XBMC will play very slowly), but the transcoded version of it. Otherwise you would have to enter the #—TRANSCODE--# folder and play from there.
Before moving to the play screenshots I will mention that when you start navigating the PS3 Media Server contents it will show the XBMC client is connected:
and when playing the transcoded contents the buffer starts to fill and the CPU usage will go up when mencoder.exe starts doing the business. As I mentioned earlier the CPU usage will go down when the buffer gets filled and then it will go up again at times to keep the buffer full.
Here are some XBMC screenshots while playing the transcoded stream – some shots are in 640x360 and some in 720x576 as I was playing with things, notice the video info in the top area as well as the CPU and memory usage (debug mode).