Sunday, December 30, 2012

Windows 8 with Intel Rapid Storage (RST) driver

Although Windows 8 performs surprisingly well with older hardware and drivers out of the box, I have generally used drivers from the component manufacturers, as the computer manufaturers stop releasing new drivers after a while (for obvious cost reasons). In this case, I'll be looking at Intel SATA AHCI Controller driver, with particular interest in NCQ.

My Dell Vostro 1520 laptop (~3 years old) came with Windows 7 Pro and AHCI enabled (NCQ was a feature I was looking for at the time - it has to be supported by both chipset and HDD), and the recent upgrade to Windows 8 Pro went smoothly in AHCI mode (I remember what pain it was to change my Windows 7 work laptop a couple years back from legacy to AHCI mode post-install).

With all that work cut out for me, all I had to do is install Intel Rapid Storage Technology (RST) package (console and driver) - latest version available 11.7.0.1013.

Dell Vostro 1520
Intel ICH9M (Intel G45 Express chipset)
Seagate ST9320423ASG HDD
Windows 8 Pro x64

  • Before: Windows 8 standard

  • After: Intel RST driver


ATTO Disk Benchmark shows some mixed results - direct, overlapped I/O, queue depth 4 (default). Microsoft driver performs better with smaller transfer sizes, where Intel driver is slightly faster with larger transfer sizes. In real life use, Intel driver feel very slightly quicker under load, or maybe it's just me - I remember making a bigger difference with older Windows versions (when was called Intel Matrix Storage Manager). Maybe Microsoft is doing a very good job, or Intel exhausting its tricks :-) In fairness, the package does much more than just AHCI (RAID, hybrid SSD acceleration etc), and it's probably doing it's best, especially with older hardware.


In the end, I guess it's up to you to decide whether you want to keep it or not - you can uninstall it and revert back to standard anytime.

Wednesday, December 26, 2012

Windows: Keyboard repeat delay (short)

One of the first few things I do on a new Windows installation is to change the keyboard repeat delay to short. It helps me with arrow navigation or backspace in code or text files, address bar or contents in web browsers etc. Some people get used to pressing a key repeatedly, but I like this one more.

Go to Control Panel > Keyboard > Speed > Character Repeat > Delay

Drag the slider to the right, then give it a test in the area down at the bottom.


Friday, November 23, 2012

Eclipse - “Show heap status”

One of the problems people complain about when starting with Eclipse is that it is slow. Then if you search the web you are advised to allocate more memory (RAM) to Eclipse (Java), but how much should you really?

Well, it all depends on the size of your project and the plugins that you use. Allocate too little and Java Garbage Collector will consume a lot of CPU going through the heap trying to remove discarded objects to make room for new ones, allocate too much than you system has free (available) and it will swap extensively to disk (“swap” file) to give you more free RAM.

How would you know if you allocated enough to Eclipse or you might need to allocate more (provided that you see you have the free memory available). This is where Eclipse “show heap status” feature comes in handy.

First of all you need to enable it: Windows > Preferences > General > Show heap status. It will show this little graph in the status bar:
  • left area (lighter) is how much heap it uses at the moment.
  • right area (darker if you right-click it and check show “Heap Max”) is how much is available from what pre-allocated (either through –Xms startup parameter or pushed past –Xms towards –Xmx)
  • hover to get the details in a tooltip;
  • click the garbage can to force a Garbage Collection.

Then look at it while using the project (build etc) – if the heap usage goes towards maximum, the colour will turn red showing that it might be struggling. You can force a garbage collection using the “garbage can”, but that’s a workaround just to finish the job instead of having to restart Eclipse. Use it too much and the JVM will pause to force an early GC.

In my example I have both minimum (-Xms) and maximum (-Xmx) heap size set to the same values (384MB) and at that moment was only using 41 MB out of it (it pre-allocated though the minimum from the system at startup). As you will be using the project it will go up and down, as needed and as GC will do it’s job.

[...]
--launcher.XXMaxPermSize
256M
[...]
-vm
C:\Program Files\Java\jdk1.7.0_09\jre\bin\server\jvm.dll
-vmargs
[...]
-Xms384m
-Xmx384m
So why is my eclipse.exe (javaw.exe) process using 600 MB of RAM when I’ve set my heap to 384 MB? It’s because Heap is not everything, there’s also the Permanent Generation (PermGen) and a few other things, so consider those as well when you decide to increase heap. On Windows use a tool like Process Explorer to see all these details – system commit, free RAM, process private bytes, working set etc.

Wednesday, November 14, 2012

GameTrailers Android app - Google Play DMCA Notice

A disgruntled user or maybe a Viacom employee has reported all GameTrailers apps in Google Play for copyright infringement, which in their turn have suspended the application, possibly to be followed by suspension of my Google Play account if not my entire Google Account, with the worst case scenario followed by a law-suit (I will gladly give them my $1.11 gained from ads, although they probably won’t settle just for that).

So kids, the lesson here is don’t do it (GameTrailers Terms & Conditions : “We take protection of copyrights, both our own and others, very seriously”). Fully linking to their website is probably not enough and using their logo probably makes it worse.

So unless you’ve got an iPhone (app) or tablet (web), you’re on your won. And wish me luck!

* * *

From: removals@google.com
Subject: Google Play DMCA Notice

This is a notification that your application, GameTrailers, with package ID com.dandar3.gametrailers, has been removed from the Google Play Store.

REASON FOR REMOVAL: Alleged copyright infringement (according to the terms of the Digital Millenium Copyright Act).

All violations are tracked. Serious or repeated violations of any nature will result in the termination of your developer account, and investigation and possible termination of related Google accounts. Please review the Developer Distribution Agreement and Content Policy to ensure that your applications are compliant with our policies.

The DMCA is a United States copyright law that provides guidelines for online service provider liability in case of copyright infringement. Click here for more information about the DMCA, and see http://www.google.com/dmca.html for the process that Google requires in order to make a DMCA complaint.

Google may reinstate your application into the Google Play Store upon receipt of a counter notification pursuant to sections 512(g)(2) and (3) of the DMCA. Click here for more information about the requirements of a counter notification and a link to a sample counter notification. If you have legal questions about this notification, you should retain your own legal counsel.

Please note that we have included a text copy of the Infringement Notice we received for your reference.

The Google Play Team

Text copy of DMCA complaint:

Dear Sir/Madam:

I am contacting you on behalf of Viacom International, Inc. (Viacom).  Under penalty of perjury, I assert that Viacom is authorized to act on behalf of the owner of the exclusive copyrights and trademarks that are alleged to be infringed herein.

Viacom has become aware that the Google Play network is hosting infringing Android applications that are listed on the spreadsheet that is attached to and is a part of this letter.  Those infringing applications contain exclusively owned Viacom character images; photographic images; character voices and sounds; storylines; video clips; show quotes; and/or songs.

I have a good faith belief that the Viacom property and material, which is described above, has not been authorized for use as part of the applications, which are listed and described on the attached spreadsheet, by the copyright owner, its agent, or the law.  I also assert that the information contained in this notice is accurate to the best of my knowledge.

We are requesting that you remove and disable access to the Android applications on the attached spreadsheet and delete the account.  We also request that you inform the application developer of the illegality of his/her conduct.

In complying with this notice, Google should not destroy any evidence, which may be relevant in a lawsuit, relating to the infringement alleged, including all associated electronic documents and data relating to the presence of infringing items on the Google Play web site, which shall be preserved while disabling public access irrespective of any document retention or corporate policy to the contrary.

Please note that this letter is not intended as a full statement of the facts; and does not constitute a waiver of any rights to recover damages incurred by virtue of any unauthorized or infringing activities occurring on your network.  All such rights, as well as claims for other relief, are expressly reserved.

Please confirm your compliance with our request within three days of receipt of this correspondence.  You may contact me to discuss this notice at Viacom International, Inc., 1515 Broadway, New York, NY, 10036, telephone, (000) 000-0000.  Or, you can send me an e-mail at xxxx@mtvn.com.

Very Truly Yours,
xxxxxxxxx, Esq.
Vice President, Anti-Piracy
Viacom Media Networks
1515 Broadway
New York, NY 10029
xxxxxxxxx
@MTVN.com

Tuesday, November 13, 2012

JBoss – Spring JDBC SQL logging (log4j)

You might occasionally need to investigate your application on a customer site (or even in your development environment look at parts of the application you’re not familiar with) from the outside first to see what they do in terms of SQL statements, before diving into the code.

Obviously a solution is to trace the statements at database level, but some databases make it easier than others or might require profiling rights and so on. But what you might have access to is your application log4j configuration.

Here’s an example on how to enable SQL logging for Spring JDBC into a separate file appender.

Note that I defined the loggers so they don’t inherit the appenders from parent packages or the root appenders (additivity=”false”) – you can remove that and they will append to predefined appenders as well as this new one. Whenever finished you can raise the level for those two loggers back to WARN to stop the logging, and if you need to leave it on for longer, see the previous post on how to roll logs. It’s probably not recommended though leaving the SQL logging on in production as it might slow the application or will produce large logs in busy environments.
<appender name="FILE_SQL" class="org.jboss.logging.appender.RollingFileAppender">
   <param name="File"      value="${jboss.server.home.dir}/log/sql.log"/>
   <param name="Threshold" value="TRACE"/>
   <param name="Encoding"  value="UTF-8" />

   <layout class="org.apache.log4j.PatternLayout">
     <param name="ConversionPattern" value="%d %-5p (%t) [%c:%L] %m%n"/>
   </layout>        
</appender>

[…]

<!-- SQL logging -->
<logger name="org.springframework.jdbc.core.JdbcTemplate" additivity="false">
  <priority   value="DEBUG"/>
  <appender-ref ref="FILE_SQL"/>
</logger>

<logger name="org.springframework.jdbc.core.StatementCreatorUtils" additivity="false">
  <priority   value="TRACE"/>
  <appender-ref ref="FILE_SQL"/>
</logger>
Sample output:
2012-11-13 16:51:01,969 DEBUG (http-8080-Processor18) [org.springframework.jdbc.core.JdbcTemplate:569] Executing prepared SQL statement [SELECT id, first_name, last_name, address, city, telephone FROM owners WHERE last_name like ?]
2012-11-13 16:51:01,973 TRACE (http-8080-Processor18) [org.springframework.jdbc.core.StatementCreatorUtils:206] Setting SQL statement parameter value: column index 1, parameter value [Doe%], value class [java.lang.String], SQL type unknown

Thursday, November 1, 2012

JBoss – Daily rolling logs (log4j)

Our standard log4j JBoss application configuration uses with size based, index rolling file appenders, and when having to investigate customers issues that happened a few days back requires quite a bit of navigation to find the particular date and time, or worse if a recurrent problem fills up the log parts, it might loose the information that could’ve otherwise helped. So recently I’ve been looking to implement daily rolling file appenders in a customer site.

Looking at Log4j DailyRollingFileAppender they are advising to use the log4j extras companion classes:

http://logging.apache.org/log4j/1.2/apidocs/org/apache/log4j/DailyRollingFileAppender.html
DailyRollingFileAppender extends FileAppender so that the underlying file is rolled over at a user chosen frequency. DailyRollingFileAppender has been observed to exhibit synchronization issues and data loss. The log4j extras companion includes alternatives which should be considered for new deployments and which are discussed in the documentation for org.apache.log4j.rolling.RollingFileAppender.
You can download the Apache Extras Companion for Apache Log4j from project website, or otherwise from Maven.org - place that in your JBoss / application CLASSPATH and restart the application.

The RollingFileAppender uses a TimeBasedRollingPolicy, controlling when the file is rolled through a SimpleDateFormat pattern (daily, hourly etc). Optionally it can compress the archive log by adding the .gz/.zip extension to the filename. You can also move the archive logs into a separate location.
   <!-- SERVER.LOG -->
   <appender name="FILE" class="org.apache.log4j.rolling.RollingFileAppender">
     <!-- Active log file name -->
     <param name="File"     value="${jboss.server.home.dir}/log/server.log" />
     <param name="Append"   value="true" />
     <param name="Encoding" value="UTF-8" />

     <rollingPolicy class="org.apache.log4j.rolling.TimeBasedRollingPolicy">
       <!-- Archive file to roll to @ midnight (yyyy-MM-dd) with compression -->
       <param name="FileNamePattern" value="${jboss.server.home.dir}/log/archive/server.%d{yyyy-MM-dd}.log.zip" />
     </rollingPolicy>

     <layout class="org.apache.log4j.PatternLayout">
       <param name="ConversionPattern" value="%d %-5p [%t] [%c{1}:%L] %m%n"/>
     </layout>
   </appender>

Sunday, October 28, 2012

Windows 8 Pro - $39.99 / €29.99

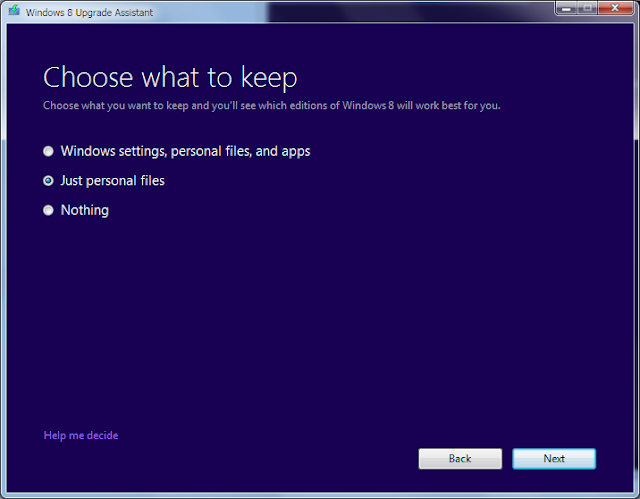
Offer valid from October 26, 2012 until January 31, 2013 and is limited to five upgrade licenses per customer. To install Windows 8 Pro, customers must be running Windows XP SP3, Windows Vista, or Windows 7. Get the full details on the special offer.


* * *

If you only take the digital download, you can later choose to write it onto a DVD yourself or save the .iso image (~2.7 GB), store it away and write to a USB flash whenever you need to using Windows 7 USD/DVD Download Tool. You can boot the DVD/USB flash for a clean install, or if you prefer the upgrade path, from the old Windows run the X:\setup.exe and follow the steps.


Friday, October 26, 2012

Remote Desktop Protocol 8.0 on Windows 7 SP1

Windows 8 and Windows Server 2012 are shipping with support for RDP 8.0 out of the box, and now Windows 7 SP1 and Windows Server 2008 R2 SP1 just got an update for it.

Remote Desktop Services Blog
http://blogs.msdn.com/b/rds/archive/2012/10/23/rdp-8-0-update-for-windows-7-sp1-released-to-web.aspx

* * *
Update 13 Nov 2013 - also see:

Remote Desktop Protocol 8.1 Update for Windows 7 SP1 released to web
* * *

Just followed the instructions to enable RDP 8.0 on a remote Windows 7 SP1 machine.

1. Install hotfix 2574819 and restart

An update is available that adds support for DTLS in Windows 7 SP1 and Windows Server 2008 R2 SP1
http://support.microsoft.com/kb/2574819

If you are unable to download the hotfix due to Windows Genuine Advantage complaining with:
This version of the Windows Genuine Advantage validation tool is no longer supported. Please download the newest version and ensure that your system clock is accurate
see this Microsoft Forums thread for a solution – opening this address in Internet Explorer will install a newer Genuine Advantage ActiveX instead of the downloadable exe that fails with above message.

2. Install update 2592687 and restart

Description of the Remote Desktop Protocol 8.0 update for Windows 7 SP1 and Windows Server 2008 R2 SP1
http://support.microsoft.com/kb/2592687

The KB goes in detail through features and known issues, as well as the steps on how to enable RDP 8.0 on a Windows 7 SP1 machine.

3. Enable RDP 8.0 on the remote computer (Windows 7 SP1)

Open Local Group Policy Editor (gpedit.msc) and
a) Enable Remote Desktop Protocol 8.0 
Computer Configuration > Administrative Templates > Windows Components > Remote Desktop Services > Remote Desktop Session Host > Remote Session Environment > Enable Remote Desktop Protocol 8.0 = Enabled

b) Enable UDP transport (optional) 
Computer Configuration > Administrative Templates > Windows Components > Remote Desktop Services > Remote Desktop Session Host > Connections > Select RDP transport protocols = Enabled, Use Both UDP and TCP 

Connecting from an updated Windows 7 SP1 machine (or a Windows 8), you will notice the change in the remote desktop client title bar (in full screen).


Before, with RDP 7.1 I noticed when moving up and down over the Start menu the highlighting was lagging behind (every few items), where now with RDP 8.0 it is much faster - probably due to improvements in the protocol as well as I assume the use of UDP packets.

Sunday, October 21, 2012

Bill Hill


http://www.forbes.com/sites/anthonykosner/2012/10/19/rip-microsoft-cleartype-inventor-bill-hill/

One of the true innovators of the reading of text on the screen, Bill Hill, died yesterday. Hill will be remembered primarily as one of the inventors of Microsoft‘s ClearType screen typography system, but his impact on our screen experience spanned a quarter century. Robert Scoble, interviewed Hill many times, says that Hill worked behind-the-scenes, but was “one of the greats.”

* * *
http://channel9.msdn.com/tags/Bill+Hill/


Saturday, October 20, 2012

Macrium Reflect Free - restoring partition / disk backups

Now with the disk backup and the rescue USB flash created earlier, we’re going through the restore process. I won’t do that on a real PC though but on a local VM, where I can take some screenshots.

Macrium Reflect running on Windows PE looks pretty much the same as in the full Windows app (and it probably is the same :-). You can browse the network (in my case) or an attached USB drive for the disk backup image.

1. Macrium Reflect - Restore, VM - Browse

Choose the “Restore Image” option and that’ll take you to the restore wizard.

Note: I’ve set up the VM display to 800x480 at first (ASUS R2H screen size) and I can see a problem as it cuts off the bottom of the wizard window. Maybe you can work around that if you learn the key sequences to push the buttons, but maybe the Windows PE might just support an external monitor you can connect through VGA? I’ve changed the VM screen to a 800x600 to move on.

2. Macrium Reflect - Restore, VM - Partitions

Select the physical destination disk and you can pick the partitions you want to restore and then click the “Copy selected partitions”. Here I will restore all 3 partitions, although you can use to only say restore the "personal” partition, and re-install the OS on the first partition later, or the other way around.

3. Macrium Reflect - Restore, VM - Partitions, destination

Click Next to get to a summary page, and then click Finish to start the restore process.

4. Macrium Reflect - Restore, VM - Progress

Leave it running, this will take a while. Although might look like like a long time, but it’s definitely shorter than having to re-install OS and applications, and certainly a lot less effort (and I should know, I’ve done this a lot).

5. Macrium Reflect - Restore, VM - Finished

Restart the system, and should now be fully restored to its previous state.

6. Macrium Reflect - Restore, VM - Restored

Now having used it end to end, I think Macrium Reflect Free is a great tool for a home user, and amazingly you get all that for free! Might sound odd, but I wasn’t paid for these last posts, I’m just genuinely surprised how easy it was and how well it worked to do exactly what I needed Smile

Friday, October 19, 2012

Macrium Reflect Free - bootable rescue media

A day may come when your old hard disk might crash - or if like me, you might break things :-) - and you’d need to restore your system. The nice thing about disk / partition backups is that you can restore your system very quickly to the previous state with contents and all, rather than reinstall Windows and the rest of your applications.

For that, we’ll be preparing a boot disk with the Macrium Reflect software – the software creates an .iso image you can write to a CD/DVD, or my preference is for a USB flash drive. If you only got a computer around the house, might want to do that early while your system is still usable, otherwise you can do that later when you need it.

1. Macrium Reflect - Rescue Media - Main

You have a choice between a Windows PE and Linux based disk – I tried the Linux image earlier and unfortunately didn’t seem to be able to connect to my Seagate GoFlex Home NAS. I can imagine the Windows PE supports a lot more network devices, so I’ll go for that.

2. Macrium Reflect - Rescue Media - Wizard Step 1

This option requires Windows Automated Installation Kit (AIK) – if you already have it downloaded somewhere you can just point to it (have used it before for Windows 8 PXE boot), otherwise the application will download it for you (1.7 GB).

3. Macrium Reflect - Rescue Media - Wizard Step 2

WAIK and image preparation finished, you can choose to burn it onto a CD/DVD or a USB flash drive.

4. Macrium Reflect - Rescue Media - Wizard Step 3

If you get the error message below when writing the image to the USB flash drive, follow the directions in this Macrium KB entry to prepare the drive and then try again.

5. Macrium Reflect - Rescue Media - USB drive error

I will go through the restore process using this newly created rescue disk in a new post soon.

Thursday, October 18, 2012

Macrium Reflect Free - disk / partition backups

Have been looking for ages for a good free partition backup (imaging) software, and Macrium Reflect Free 5.0 does exactly what I wanted and even more – I’m quite surprised the free version has so many features really. While Windows Backup has improved quite a bit in the last Windows versions and handy for file backups, what I needed is an application to image entire partitions or disks and be able to easily restore the disk contents after a system crash. Another feature I was looking for is to have a bootable CD or flash drive so I can restore the system without the need for a full OS. I’ve been reading on the likes of Clonezilla, PING and DriveImage XML, but they just don’t seem very easy to use, especially on the last part - they are using Linux based boot images, mostly console based and they just don’t seem very friendly to use (here is a good start if you are looking into this).

In today’s exercise I’m going to backup the entire disk of my ASUS R2H (all partitions), in preparation for installing Ubuntu 12.04 next week (mm, that’ll be interesting :-), but just as well you can choose one partition if you want to image them separately or some more often than others. The windows are a bit tall for the 800x480 screen (R2H), so I’m running it through Remote Desktop in 800x600 and it seems to fit just fine – it appears they did think of smaller screen computers, but not that small.

The main interface is colorful and easy on the eye.


I’m going to save the disk image on my Seagate GoFlex Home NAS on the network, but a USB hard drive should be just as good.


The summary page has an advanced button (bottom left) where you can choose the compression level, split the image into separate files, enter a comment or choose to shutdown when finished, if you have to leave it running for longer on its own.
 

Initial estimation is about 2 hours for the 60 GB disk (about 80% full) – the system is quite busy on the CPU, maybe the medium compression is a bit too much for the tiny Celeron. Grab a cup of coffee or find something else to do in the meantime :-)


That was quite accurate, 2 hours later disk backup is finished – with an image file of about 40 GB.


Now if you switch to Restore tab, you can see the image and you can choose to verify it…
 

or, just above that (or from left tasks) you can choose to browse the image – that will mount a partition as read-only in Explorer. I see that very useful if want to pick a few files from an image, without the need for a full restore.
 

That’s it from the backup perspective. There will be two other posts on how to create a recovery USB flash drive and how to use that to restore the backup we just did.

Monday, October 15, 2012

Groovy Monkey plugin on Eclipse 4.x

Last version of the Groovy Monkey plugin (http://sourceforge.net/projects/groovy-monkey/) was released for Eclipse 3.2 a good while ago, but it installed fine on pretty much everything up to Eclipse 3.8. It stopped installing though on Eclipse 4.2 and I created this ticket. Thankfully a SourceForce user (fmjrey) found a solution about a month after!

If you would try to install from the update site, it will report a missing dependency that was removed in Eclipse 4.2 (4. Update Manager bundles removed).
Cannot complete the install because one or more required items could not be found.
  Software being installed: Groovy Monkey 0.6.1 (net.sf.groovyMonkey.feature.group 0.6.1)
  Missing requirement: Groovy Monkey 0.6.1 (net.sf.groovyMonkey 0.6.1) requires 'bundle org.eclipse.update.core 0.0.0' but it could not be found
  Cannot satisfy dependency:
    From: Groovy Monkey 0.6.1 (net.sf.groovyMonkey.feature.group 0.6.1)
    To: net.sf.groovyMonkey [0.6.1]

The solution is to temporarily add the Eclipse 3.8 update site so you can install the plugin, then you can remove it after (http://download.eclipse.org/eclipse/updates/3.8).


Try again to install the plugin, but make sure you check the box that says “Contact all update sites during install to find required software”.


That should find and download the missing dependencies and install successfully now.

When finished, after the restart, you can go back in Preferences > Install / Update > Available Software Sites and remove the Eclipse 3.8 update site (above).


Friday, October 12, 2012

ExamDiff Pro: customizing display colours

I’ve been using ExamDiff Pro for 9 years next week (funny how found that looking for the emails with the license to re-install on a new Windows :-) and it was probably the  best 30$ I ever spent, considering I’ve used the hell out ExamDiff Pro 3.x until recently upgraded to 5.5.

It is an impressive piece of software you get for the money - file compare with differences at character level, ability to save the compare results as a portable webpage you can attach to emails with fully synchronized scrolling, looking at changes with and without customized ignores at a click of a button, command line support for scripting bulk compares, directory compare and merging, and recently found a feature I like, comparing files with ability to exclude parts (columns) using regular expressions, great for comparing logs with different date/time stamps, and the list could go on. Don’t get me wrong, I continue trying free alternatives out there and even use them in customer sites (like WinMerge for example), where I don’t have my ExamDiff Pro; but as a software developer, as soon as I got my first few checks I just had to look for better tools, and it did pay off in time savings and less effort.

But this is not as much about the software itself, as it is about the presentation – I always thought the standard colours in the screenshots they have on the website weren’t doing the software any favours. I thought they were too bland and not very helpful. Maybe it’s just me, but if you do a lot of file comparing you probably want to spot the differences quickly enough to figure out what the changes are about.

And not that you can only fully customize them, but you can also export the entire configuration as an Options.txt file to store away and simply import again on a new Windows installation or I don’t know, share them with yoru friends (obviously programmers as well :-).

This is how the standard colours look like – I mean, look at the colour set: dark red is additions, blue is deletions, on a dark grey background, and then the entire block on a muddy yellow (?!)

ExamDiff Pro - standard colors

And here are my colours – I have additions as green, deletions as red on a bright yellow background for the modified text to stand out, removing the block background colour (set to white), to focus on the text changes themselves. I know the whole taste in colours is controversial, some people like one way and others like some other way, but I thought I might put it there - I know I changed mine quite late, on a slow Monday and kept them since :-)

ExamDiff Pro - customized colors

Thursday, October 4, 2012

Android: Custom round buttons

Recently working on my XBMC4Xbox Remote app, struggling with a few buttons to apply both text and a scaled image while keeping an evenly distributed layout, couldn’t get it work very well, so I gave up for now and went for an @android:color/transparent background just to move on. Then it looked a bit too bare and searched if possible to apply some borders, maybe a background colour when the button is pressed and I found that it is possible using drawable shapes.

You can create a selector and place it in res/drawable/, e.g. sel_button_round.xml

<?xml version="1.0" encoding="utf-8"?>
<selector xmlns:android="http://schemas.android.com/apk/res/android">
<item android:state_pressed="false">
<shape android:shape="rectangle" >
<stroke android:width ="2dp" android:color="#77CCCCCC" />
<corners android:radius="15dp" />
</shape>
</item>

<item android:state_pressed="true" >
<shape android:shape="rectangle">
<solid android:color ="#55CCCCCC" />
<stroke android:width ="2dp" android:color="#77CCCCCC" />
<corners android:radius="15dp" />
</shape>
</item>
</selector>

The interesting things are obviously the item definitions for each state (this is just a small sample, there are more, see documentation), the rectangle shape with solid colour to fill with, the stroke to define the line around it and then the corners with your choice of radius (the higher the value the rounder it is). Also found interesting while looking for this that you can define the alpha as part of colour definition (followed by the red, green and blue parts) - that way you can choose a colour for the borders and maybe even the fill , and then maybe the same colour but with a lighter alpha for a pressed effect, I don’t know, up to you really.

Use the selector resource as the background for the button (should work for other views, initially I had a clickable TextView), e.g. res/layout/activity_main.xml

<LinearLayout xmlns:android="http://schemas.android.com/apk/res/android"
xmlns:tools="http://schemas.android.com/tools"
android:layout_width="fill_parent"
android:layout_height="fill_parent"
android:orientation="horizontal"
android:padding="3dp">

<Button
android:id="@+id/buttonOK"
android:layout_width="0dp"
android:layout_height="wrap_content"
android:layout_weight="1"
android:padding="11dp"
android:text="@android:string/ok"
android:textColor="@android:color/white"
android:background="@drawable/sel_button_round" />

<Button
android:id="@+id/buttonCancel"
android:layout_width="0dp"
android:layout_height="wrap_content"
android:layout_weight="1"
android:text="@android:string/cancel" />

</LinearLayout>

And here is the result (normal and pressed), next to a standard button.

Android, custom round button, normalAndroid, custom round button, pressed

Friday, September 28, 2012

Blogger Dynamic Views – “Sidebar” with vertical scroll

Switching this blog to Dynamic Views a few months ago I thought that would make for a nicer user experience, but then I recently realized that most people don’t know that in Sidebar view there are more posts on the left that what you see, and that you can scroll through by hovering and then using the wheel, or by clicking an entry to the start or the end of the list and that will make it automatically scroll showing more posts.

After sending the feedback to Google – which even if they will consider it, it will take a while to get it in – looking for ways to change and customize the Dynamic Views I found a lot of useful tips at http://www.southernspeakers.net/, all by simply by using additional custom CSS styles.

Then it hit me, I may be able to force the vertical scrollbar with CSS code! The solution is not perfect, as it is only renders the scrollbar for as many entries as configured to load in a batch, but it’s something and sort of plants the idea that there are more posts in there.

You can add the custom CSS style in Blogger in Template > Customize > Advanced > Add CSS.
div#sidebar { overflow-y: scroll !important; }
http://www.w3schools.com/cssref/css3_pr_overflow-y.asp
http://www.w3.org/TR/CSS21/cascade.html#important-rules


As a tip, you can find these bits with F12 developer tools (very similar in all current browsers) and then use the pointer in the toolbar to focus the element you want to work with.


Sunday, September 23, 2012

Windows 8 Enterprise Evaluation on ASUS R2H

ASUS R2H running Windows 8 Enterprise 90 days evaluation!

Installation steps:

Windows 8 Enterprise Evaluation - ASUS R2H - Metro

Windows 8 Enterprise Evaluation - ASUS R2H - My Computer

Windows 8 Enterprise Evaluation - ASUS R2H - System Properties

Windows 8 Enterprise Evaluation - ASUS R2H - Performance Rating

Windows 8 Enterprise Evaluation - ASUS R2H - Task Manager - Memory

Monday, September 17, 2012